Friday, October 28, 2011

Happy Birthday Chocolate Cake w/ Chocolate Buttercream Frosting

My baby girl just turned 4!  I can't believe it!  She is growing up so fast and as wonderful as it is to see her growing and exploring the world and making friends, it is bittersweet as she isn't my itty bitty tiny baby anymore.  She is a bit spoiled I must say.  We brought cupcakes and party stuff to her school for a party, the next day we went to Disneyland Tokyo, and the following day we invited her best friend over and did cake and presents.  

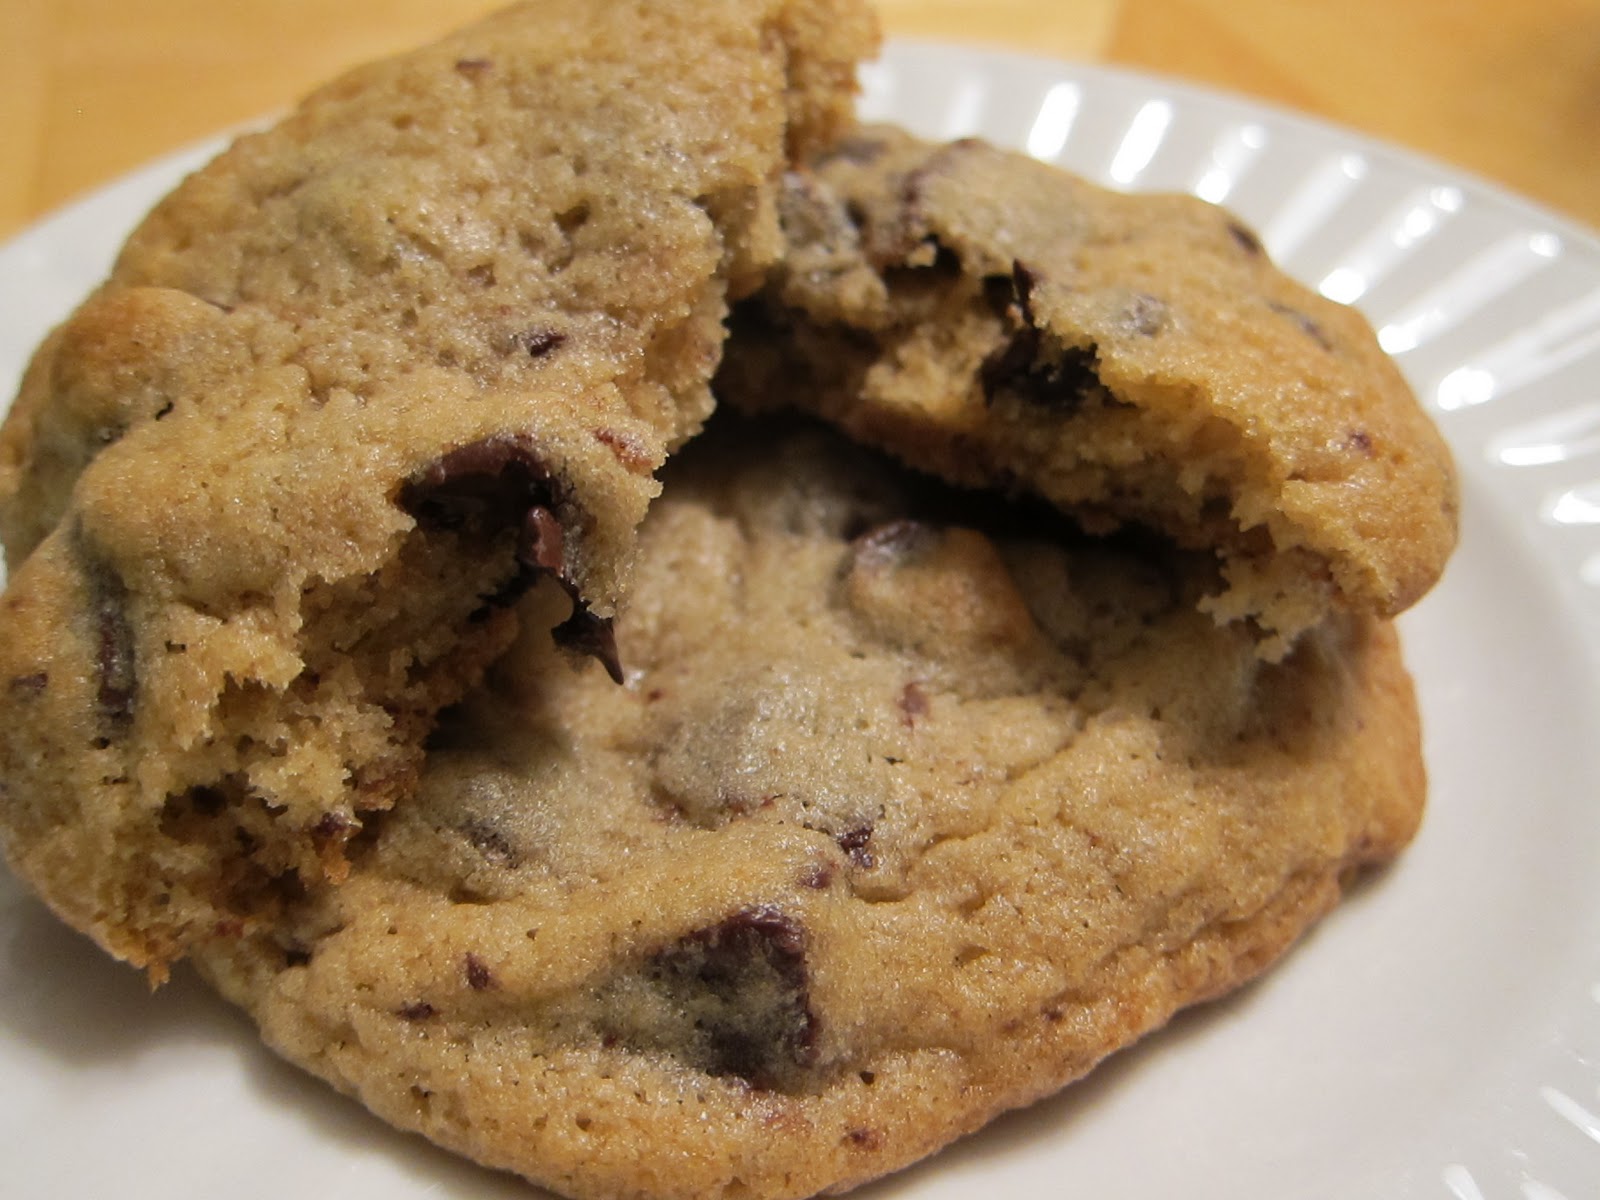
She wanted a pony cake and requested chocolate cake with chocolate frosting.  That's my girl, chocolate, chocolate and more chocolate.  I made the cake up and thought it was too plain so decided to make some pink and purple splatters to give it more color.  Not the best idea, especially last minute.  My splatters melted because it was too hot and humid here and they were a bit runny but in my head it seemed like such a cute idea.  But the cake tasted amazing and she loved it.  That's all that matters.  This frosting is probably the best chocolate frosting I've ever made and I think this cake recipe will be my new "go to".  It was unbelievably rich and that's what I like.  I did double the recipe when I made it because I needed 4 cakes for the cake I was making but this recipe below makes two standard 9-inch cakes.   


Chocolate Cake

1 3/4 c. all-purpose flour
2 c. sugar
3/4 c. cocoa powder
1 1/2 tsp. baking soda
1 1/2 tsp. baking powder1 teaspoon salt
2 eggs
1 cup milk
1/2 cup vegetable oil
1 teaspoon vanilla
1 cup boiling water
Birthday Girl!


Preheat oven to 350 degrees. Prepare two 9-inch cake pans by rubbing with butter, sprinkling with flour and tapping out extra. In a large bowl combine flour, sugar, cocoa, baking soda, baking powder and salt. Mix together with a wooden spoon then set aside. In small bowl combine eggs, milk, oil and vanilla. Beat well with hand mixer. Slowly add boiling water and mix. Add wet ingredients to flour mixture and fold and stir until smooth. Pour batter into pans, dividing evenly. Bake for 30-35 minutes. Remove cake from pans and cool on racks.


Chocolate Buttercream Frosting

Peyton in front of Goofy's house.
1/2 cup solid vegetable shortening
1/2 cup (1 stick) butter or margarine, softened
3/4 cup cocoa or three 1 oz. unsweetened chocolate squares, melted
1 tsp. vanilla extract
4 cups sifted confectioners' sugar (approximately 1 lb.)
3-4 tablespoons milk

Makes about 3 c. frosting 

In large bowl, cream shortening and butter with electric mixer. Add cocoa and vanilla. Gradually add sugar, one cup at a time, beating well on medium speed. Scrape sides and bottom of bowl often. When all sugar has been mixed in, icing will appear dry. Add milk and beat at medium speed until light and fluffy. Keep bowl covered with a damp cloth until ready to use. For best results, keep icing bowl in refrigerator when not in use. Refrigerated in an airtight container, this icing can be stored 2 weeks. Rewhip before using.

This is a Wilton frosting recipe and I believe an Ina Garten chocolate cake recipe but I had it written down from a while ago so can't be positive. 

My Cinderella

Whisking Wednesday

I would just like to thank everyone that participated in all past Whisking Wednesday parties.  I have decided to stop hosting them as I find I just simply don't have the time.  I rather put a little more time and effort into getting my recipes posted which seem to sit here for a week or two at a time before I get to them.  My wonderful children keep me very busy which I quite enjoy and I never seem to remember to do this.  Everyone have a great Halloween!

Tuesday, October 25, 2011

Shepherd's Pie

I love Shepherd's pie.  My Mom and Dad have both been making this for as long as I can remember.  I remember it many different ways too.  My mom did just beef, corn and potatoes and we ate it with bread.  I remember my Dad wrapping it in tortillas and frying them a bit.  Mine is a bit different than what I ate as a child though but I love making it and love eating it.  I know Shepherd's pie normally is made with lamb but lamb is expensive and ground beef really isn't.  Plus, I can't get lamb here in Japan or at least I don't think I can.  This dish is awesome.  Creamy mashed potatoes with cheese.  A brown gravy sauce over sauteed ground beef and your favorite vegetables.  What's not to love!?

Shepherd's Pie

1 lb. ground beef
1 c. chopped carrots
1 c. frozen peas
4 slices of diced bacon
1 1/2- 2 c. beef stock
2 cloves minced garlic
4-6 yukon gold potatoes
1 stick butter
1/4 c. whole milk
1/4 c. sour cream
1 egg yolk
1/2 c. cheddar cheese
3 tbsp. flour
1 tbsp. Worcestershire 


Dice your potatoes and place them in a large pan with salted water.  Bring to a boil until fork tender.  Drain.  Add in 1/2 stick of butter, 1/4 c. sour cream & whole milk.  Mash and mix the potatoes with the butter and sour cream and slowly add the milk.  You can always add more milk to make your potatoes creamier but you can't undo it if you add to much.  You may need a bit more milk than the recipe calls for.  Add salt and pepper and then set potatoes aside.  Add bacon to a skillet and cook until fat is rendered and bacon is crispy.  Pull bacon out and set aside.  Add ground beef  to the pan with the bacon grease and cook until brown.  In a separate pan add a splash of oil and saute your carrots until almost tender (personal preference, you may like them more or less tender).   Once beef is brown add in your already cooked carrots and frozen peas.  Make sure to add salt and pepper to your beef and carrots.   Add in about a tablespoon of Worcestershire sauce.   Add in about 3 tbsp. of flour or until meat mixture is pasty when stirred.  Slowly add in your beef stock (you may need more or less than the recipe calls for) until a gravy is formed allowing to cook for about 5 minutes to get some of the raw flour taste out of the gravy.  The gravy should coat the back of a spoon nicely without being too runny.  Add the bacon back into the beef gravy mixture.  Preheat oven to 350.  Pour beef mixture into a casserole dish. Add 1 egg yolk to cooled potatoes and cheese.   The egg yolk will give your potatoes a really nice golden yellow color when baking.  Spoon and spread the potato mixture on top of the beef mixture.  Add more salt and pepper to the top of the potatoes.  Bake for about 20-25 minutes or until potatoes are golden.  You can also make this dish ahead and place in the refrigerator.  If you do that you will need to bake it for longer since it will be cold, about 40 minutes.  Enjoy!  

I'd like to mention that I didn't actually measure when making this recipe as I make it all the time and I just eyeball it really.  These are rough estimates but the recipe is very flexible so just go with what you think is right.  This is a great dinner recipe though and leaves plenty of leftovers for the week.

Saturday, October 22, 2011

Old Fashioned Sugar Cookies

 It is always amazing to me how such a simple easy recipe can be so tasty.  Sometimes an old fashioned sugar cookie just hits the spot.  Plus they are so versatile!  Add sprinkles, cut into shapes, add frosting, do thumb print cookies, dip in chocolate.  I love the basics. I found this recipe a while back on Moms Who Think.


 Old Fashioned Sugar Cookies

 3 cups sifted all-purpose flour
1 1/2 teaspoons baking powder
1/2 teaspoon salt
1 cup white sugar
1 cup butter (softened at room temperature)
1 egg, lightly beaten (egg should be at room temperature)
3 Tablespoons half-and-half
2 teaspoons vanilla extract
  
Preheat oven to 400 degrees F.  Sift together all-purpose flour, baking powder, sugar and salt.
Cut in butter and blend with a pastry blender until mixture is crumbly.  With a fork, stir in lightly beaten egg, vanilla and half-and-half. Blend well with fork, then your hands to ensure thorough blending. Chill dough for one hour for easier rolling.  If you are not rolling the dough, chill for 15 minutes then skip to step 6 for baking.  On a floured surface, roll out dough to 1/4 inch thickness. Cut into shapes.  Place on baking sheet covered with parchment paper. Sprinkle with sugar or leave plain for decorating with icing.  Bake for 6 - 7 minutes, or until lightly brown.

Wednesday, October 19, 2011

Whisking Wednesdays #22

Photobucket

Welcome to Whisking Wednesdays! 


So I'm not going to say I'm late since technically by the time I post this it is still Wednesday somewhere in the states, it just so happens to be Thursday in Japan.  Super busy week this week like always.  Seems that I've had nothing but pumpkin on my mind lately.  I can't seem to stock up on enough canned pumpkin from the store and they seem to always run out leaving me quite sad until the next shipment comes in.  This week I'm thinking it is time to stick a pumpkin pie in the oven.  Nothing says fall and holidays like a pumpkin pie.  Hope you all are prepared for Halloween and had a great week this week. 

Thank you all who participated in this week's Whisking Wednesdays and hope to see you back again this week!


Aren't these cute?  My daughter saw these and started giggling.  Another winner at The Seven Year Cottage! 


#1
 Lil Monsters
The Seven Year Cottage 


Not only do these sound good but they look good too.  Just look at all that frosting!  Yum!

#2  
 Candy Corn Cupcakes
Sugar Beams & Other Half Baked Adventures 


Who doesn't like Reese's?  And to make it better, homemade peanut butter cups.  Oh yeah!  Definitely has mine name all over this one!

#3
Peanut Butter Balls


Photobucket

Photobucket


The Rules:
  1. Please link up to the URL of your post, not the URL of your main blog. When it asks for "Name", type in the name of your recipe.
  2. Please leave a link back to this post in your post or Grab My Button.
  3. Share your delicious recipes from this week. You are welcome to link up multiple recipes.
  4. Leave me a comment and let me know that you've linked up.
  5. Please visit at least two others and comment on the goodies they've added to this party.
  6. Also, I would love for you to follow me but it isn't a requirement.  
This weeks theme is going to be just your favorite recipe you've made from the week.  Whether it is a dessert, breakfast, dinner or snack.  


Tuesday, October 18, 2011

Lemon Blueberry Pancakes

My favorite flavor in a pancake is lemon.  It makes it just such a refreshing awesome pancake.  Since moving to Japan my husband's biggest complaint is that we can't just go out to breakfast somewhere and get blueberry pancakes like we could in the states.  So, to treat him I picked up some fresh blueberries and made him some at home.


Lemon Blueberry Buttermilk Pancakes

1 1/2 cups unbleached all-purpose flour
3 tablespoons cane sugar
1 teaspoon baking powder 

1/2 teaspoon baking soda 

1/2 teaspoon salt 

2 large eggs, separated 

2 tablespoons vegetable oil 

1 1/3 cups buttermilk 

½ tbsp. lemon zest 

1/8 teaspoon vanilla extract 

Pinch cream of tartar
2 cups fresh blueberries 


Mix together the flour, sugar, baking powder, baking soda and salt and set aside. In a separate bowl, combine the egg yolks, oil, buttermilk, lemon zest and vanilla extract. 

Make a well in the center of the dry ingredients and pour in the liquid mixture. Mix together until flour is just incorporated. 

In a small bowl, beat egg whites and cream of tartar until soft peaks form. Fold the egg whites into the batter just until incorporated. Let set for 15 minutes and gently fold in the blueberries. 

Heat a nonstick pan or cast iron griddle over medium heat. Brush with the butter and heat until the butter just begins to sizzle. Scoop scant 1/4 cup of the batter into the pan or onto the griddle and cook until bubbles appear on the top surface and the bottom is golden brown, about 1 to 1 1/2 minutes. Flip over and cook until the bottom is lightly golden brown, about 45 seconds. Remove to a baking sheet and keep warm in a low oven.

Saturday, October 15, 2011

Candy Corn Cookies

Well Halloween is right around the corner so I've been seeing candy corn in, on and around everything lately.  So I threw some into a batch of cookies just for fun.  My daughter loves candy corn but I'm pretty sure all kids do.  She loved the idea of the candy corn in her cookie.  The candy corn kinda melts into the cookie and forms a crunchy sugary thing on the outer edges that was really tasty. 


Candy Corn Cookies

1 stick room temp. butter
1/2 c. shortening
1 c. brown sugar
1/2 c. white sugar
2 eggs, room temp.
1 tsp. vanilla
1/2 tsp. baking soda
1 tsp. baking powder
2 1/4 c. all-purpose flour
pinch of salt
2 c. chocolate chips
1 c. chopped candy corns

Preheat oven to 375 degrees.  Combine butter, shortening and sugars in a mixer and beat until creamy and well combined.  In a separate bowl combine flour, salt, baking powder and baking soda.  In butter mixture add in eggs, one at a time making sure each is combined before adding the next.  Add in vanilla.  Add in flour mixture and mix until combined.  Then add in your chocolate and candy corns.  On a baking sheet lined with parchment paper place tablespoon size balls of cookie dough.  Bake 10-12 minutes or until golden around the edges.

Pumpkin Monkey Bread


Ahh, my favorite time of year is when I get to break out the pumpkin!  I'm a chocolate girl but the closest rival to chocolate for me is pumpkin desserts.  I saw this recently at Sugar Crafter and the second I saw it I knew I had to have it, and fast!  This bread was such a huge hit in my house.  Not a single complaint from anyone.  We ate it all pretty quickly too.  The next morning there was none in sight.  This was pretty easy to do, and if you have kids they love making a million little dough balls and helping out.  I always enjoy a recipe that I can include them in.  Plus they were able to help dipping the dough balls into cinnamon and sugar and tossing them into the pan too.  Definitely a hit that we'll be having many times over.

Pumpkin Monkey Bread

Dough:
3 1/4 cups flour, plus extra for kneading
1/2 tsp salt
2 tsp. cinnamon
1 tsp. pumpkin pie spice
2 Tbsp unsalted butter, melted
1/2 cup warm milk
1/4 cup warm water
2/3 cup pumpkin puree
1/2 cup sugar
2 1/4 tsp active dry yeast
    Coating:

    1 c. sugar
    2 tsp. cinnamon
    3/4 stick melted butter

    Glaze:
    2/3 c. powdered sugar
    2 tbsp. maple syrup
    2 tbsp. milk
          In a large bowl, whisk together the flour, salt, and spices.  In a separate bowl combine the yeast and warm water (make sure it isn't too warm so you don't kill your yeast).  Add 1 tsp. of sugar and allow to sit for a few minutes to active your yeast.  Add in the butter, milk,  pumpkin puree, and remaining sugar.  Add the wet ingredients into the flour and using a wooden spoon stir to combine.  You should have a very sticky dough.  Cover your work surface with flour and place sticky dough onto flour and knead until a smooth ball of dough.  Place in a large butter greased glass bowl (covered) and allow to rise until doubled in size, roughly 1 hour.    Now go ahead and get your coating prepared by melting the butter in one bowl and combining the cinnamon and sugar in another.  Pull off tablespoon size pieces of dough and roll them into a ball between your hands.  Dip them into the butter, then the sugar and place in a buttered bundt pan.  Start placing the balls all around in a circle, one on top of another.  You should end up with about 35-45 balls.  Like picture above.  Allow to rise covered for another hour.

          Preheat the oven to 350 degrees.  Bake 28-35 minutes or until golden and just done.  You can stick a knife in to see if it comes out clean.  Allow to cool for about 5 minutes before inverting onto a serving platter.  In a bowl that has a pouring spout combine the powdered sugar, syrup and milk and drizzle over the bread.  If glaze is too thin add more powdered sugar, too thick at more milk. 


          Wednesday, October 12, 2011

          Whisking Wednesdays #21

          Photobucket

          Welcome to Whisking Wednesdays! 


          Ok, so I'm late again.  I was on time for a few weeks in a row and it seems I'm back to being totally forgetful of what day it is.  Habit of someone that doesn't work and my husband has a rotation schedule so isn't off on weekends but every 4 days instead.  So needless to say I get so very confused!  Plus, spending over 2 hours in the car multiple days of the week taking my daughter to and from school just drains my brain power.  Driving in Japan is insane and totally exhausting and nothing like I've ever seen before.  Take everything you've learned as right and normal from the states and just immediately toss it out the window.  Running red lights - acceptable.  Parking and/or stopping in the middle of the road, any road, with no regards for traffic - acceptable.  Swerving into oncoming traffic to go around all the parked/stopped cars in the road - acceptable.  Pedestrians jumping out into traffic without ever looking in your direction - acceptable.  Motorcycles and mopeds swerving in and out of traffic and around cars and creating their own lanes without any regard for personal safety or the other vehicles - even more acceptable! But I'm not complaining, I love in here and couldn't be happier!  Hope everyone else had a wonderful week and I can't wait to see all the new recipes linked up!

          Thank you all who participated in this week's Whisking Wednesdays and hope to see you back again this week!


          These are so awesome!  I love this and think I could even do this myself. It looks so fun and creative and of course it is almost Halloween!


          In honor of Halloween this black widow gets the #1 spot.  It is so cute!  And come on, there's Oreos in it, so you know it has got to be good!


          Black Widow


          Can we say chocolately awesomeness?  These look divine.  I love chocolate almost as much as I love my children and anything that has the worlds "triple chocolate" in gets my attention.


          #2 
          Something Swanky
          Triple Chocolate Cupcakes (By a Guest Blogger Caroline)


          With my daughter starting pre-kindergarten recently I've been looking for new and fun ideas for her to bring for her school lunch everyday.  So this caught my eye.  It is pretty, healthy and creative.  

          #3
          Allergy Free Cookery 
          Lunch Box Love 


          Photobucket

          Photobucket


          The Rules:
          1. Please link up to the URL of your post, not the URL of your main blog. When it asks for "Name", type in the name of your recipe.
          2. Please leave a link back to this post in your post or Grab My Button.
          3. Share your delicious recipes from this week. You are welcome to link up multiple recipes.
          4. Leave me a comment and let me know that you've linked up.
          5. Please visit at least two others and comment on the goodies they've added to this party.
          6. Also, I would love for you to follow me but it isn't a requirement.  
          This weeks theme is going to be just your favorite recipe you've made from the week.  Whether it is a dessert, breakfast, dinner or snack.  


          Saturday, October 8, 2011

          Chocolate Chunk Cookies

          I usually use shortening in my cookie recipes but felt the need to give butter another shot since it has been so long since I actually used just butter in a recipe.   I still stand by my original thoughts and I just like shortening better in my cookies.  I mean butter is good but it just doesn't give me the big, fluffy, chewy, awesome that shortening gives to cookies.  Though I will say using half butter and have shortening seems to give it the best of both worlds.  I love these cookies.  These are my standard "go to" when I want to whip up a batch of cookies any day of the week.


          Chocolate Chunk Cookies

          2 1/2 c. all-purpose flour
          1 c. brown sugar
          1/2 c. white sugar
          2 eggs, room temperature
          2 sticks room temperature butter (or 1 c. shortening)
          1 tsp. vanilla extract
          1/2 tsp. baking soda
          1/2 tsp. baking powder
          1/4 tsp. salt
          1 bag dark chocolate chunks
          1/2 bag semi-sweet or bittersweet chocolate chips

          Preheat oven to 375 degrees.  Combine sugar and butter and beat until well combined.  Add in eggs one at a time.  Add in vanilla.  In a separate bowl combine flour, salt, baking powder, and baking soda and whisk to combine.  Add flour mixture into creamed butter mixture.  Pour in chocolate.  Drop by heaping tablespoons onto parchment paper and bake 9-12 minutes or until edges are just brown.  Allow to cool a bit before serving. 

          Friday, October 7, 2011

          Bacon Chocolate Chip Cookies

          Ok so you here bacon and chocolate and it is like WHAT?  But it seems the world is ready for this kind of thing.  You hear about chocolate dipped bacon and bacon cookies and all sorts of desserts that now have the most amazing piece of meat that exists thrown into it.  Of course, I was skeptical.  I mean bacon in a dessert? This month's Crazy Cooking Challenge was the find the ultimate chocolate chip cookie.  I wanted something really unique.  Not just your ordinary cookie.  I found this cookie at Craving Chronicles and knew it was something I had to try.  Now the rest of my family wasn't so sure about this idea.  My husband couldn't believe what I was doing and felt it was just wrong.  My 4 year old daughter thought it was by far the greatest thing she had ever heard of.  I actually just laughed as I ate these.  I wouldn't say they were the best cookie I've ever eaten but I really had fun making it and trying something new.  My daughter on the other hand has found her favorite cookie for life. 

          Also this is a great blog that I really enjoyed reading.  Theresa loves baking and photography.  I really enjoyed not only looking through her recipes but loved seeing the pictures she has taken as well.  Her photographs truly are amazing, her food pictures are just so vibrant and really make you want to run into the kitchen to recreate the things you are seeing. 

          Photobucket

          Bacon Chocolate Chip Cookies
          Adapted from Craving Chronicles


          2 cups minus 2 tablespoons (8 1/2 ounces) cake flour
          1 2/3 cups (8 1/2 ounces) All-Purpose flour
          1 1/4 teaspoons baking soda
          1 1/2 teaspoons baking powder
          1/2 teaspoons coarse salt
          2 1/2 sticks (1 1/4 cups) unsalted butter, room temperature
          1 1/4 cups (10 ounces) light brown sugar
          1 cup plus 2 tablespoons (8 ounces) granulated sugar
          2 large eggs
          2 teaspoons natural vanilla extract
          2 1/4 cups bittersweet chocolate chips
          6 slices crisp cooked thick cut bacon, chopped
          1/8 c. maple syrup

          In a medium bowl, whisk together flours, baking soda, baking powder and salt. Set aside.
          Using a mixer with paddle attachment, cream together butter and sugars until light and fluffy, about 5 minutes. Add eggs one at a time, incorporating completely after each addition. Add vanilla. Reduce mixer to lowest speed and carefully add flour mixture. Mix until just combined. Fold in chocolate chips by hand.  Cover dough with plastic wrap and refrigerate 24 – 36 hours, up to 72 hours.

          Pull dough out and allow to come to room temperature.  Meanwhile dice bacon and come until golden brown and crispy.  Add in maple syrup and stir allowing the syrup to reduce.  Allow candied bacon to cool.  Preheat oven to 350°F. Line baking sheets with parchment paper.  When dough has warmed enough to be pliable but not too soft, fold in chopped bacon. Using a 2 tablespoon cookie scoop, measure 8 cookies out on a baking sheet. Bake one sheet at a time, 10-14 minutes or until edges are starting to brown. Cool 2-3 minutes on baking sheet, then transfer to a wire rack to cool completely.

          Wednesday, October 5, 2011

          Whisking Wednesdays #20

          Photobucket

          Welcome to Whisking Wednesdays! 


          I love the fall.  I love walking into the stores and seeing pumpkins and all the fall vegetables coming out, like acorn and butternut squash.  I love watching the leaves turn and the weather get cooler.  This is my favorite time of year.  I'm already thinking of all the stews and pies that need to be made as the weather gets cooler.  I love making pies, especially pumpkin! 


          Thank you all who participated in this week's Whisking Wednesdays and hope to see you back again this week!


          These are so awesome!  I love this and think I could even do this myself. It looks so fun and creative and of course it is almost Halloween!


          #1
          Mrs. Fox's Sweets
          Ghost & Monsters Halloween Brownies


          My absolute favorite frosting in peanut butter frosting.  So peanut butter frosting on brownies with peanut butter cups, YUM!


          #2 
          Lady Behind the Curtain 
          Brownies with Peanut Butter Frosting 


          I always love seeing homemade versions of candy bars.  I love butterfingers and had no idea you made them with candy corn.  Definitely gotta try these!


          #3
          Brandy's Crafts 
          Homemade Butterfingers 


          Photobucket

          Photobucket


          The Rules:
          1. Please link up to the URL of your post, not the URL of your main blog. When it asks for "Name", type in the name of your recipe.
          2. Please leave a link back to this post in your post or Grab My Button.
          3. Share your delicious recipes from this week. You are welcome to link up multiple recipes.
          4. Leave me a comment and let me know that you've linked up.
          5. Please visit at least two others and comment on the goodies they've added to this party.
          6. Also, I would love for you to follow me but it isn't a requirement.  
          This weeks theme is going to be just your favorite recipe you've made from the week.  Whether it is a dessert, breakfast, dinner or snack.  


          Spiced Pumpkin Cake

          I love, love, love pumpkin.  Anything and everything you can make with it, I'll eat it.  I love the pies, cakes, pancakes, puddings, donuts, all of it.  This is one of my favorites that I like to make.  This cake is so moist and delicious.  I love the smell of the pumpkin and cinnamon throughout my house while it bakes.  These work great as muffins too, though I usually just use a bundt pan because it is pretty.  A few years ago I found a recipe in a magazine for a spiced cake and I changed it around and added what I liked, took out what I didn't and just made it more into my own.  I love using orange juice in the glaze, it just really gives it this extra tangy flavor that works so well with the cake.  

          Spiced Pumpkin Cake

          1 ¾ c. flour
          1 tsp. baking soda
          1 tsp. salt
          2 tsp. cinnamon
          2 tsp. pumpkin pie spice
          ½ tsp. baking powder
          1 ½ c. sugar
          ½ stick melted butter
          1 can of pumpkin puree
          2 eggs
          2 tsp. grated fresh ginger
          2 tsp. grated orange peel

          Glaze:
          1 c. powdered sugar
          2 tbsp. half and half
          1 tsp. vanilla
          1 tbsp. orange juice

          Preheat oven to 350 degrees.  Combine flour, baking soda, salt, cinnamon, pumpkin pie spice and baking powder in a bowl and whisk to remove all lumps and combine.  In a seperate bowl combine the pumpkin puree, eggs, ginger, orange peel and sugar.  Whisk in the melted butter.  Pour the flour mixture into the pumpkin mixture and whisk until just combined.  Pour into a sprayed prepared dish like a bundt pan and bake 45-55 minutes or until a knife comes out clean.

          While cake is cooling whisk together the powdered sugar, half and half, vanilla and orange juice until combined.  If it is too thick add a splash more of orange juice or too thin add a bit more powdered sugar.

          Pour over cake and allow glaze to set before serving. 


          Post shared with:
          Crumbs and Chaos

          Saturday, October 1, 2011

          Nutella Cookies

          Ahhh, more cookies!  These cookies were soooo good.  Granted when you add in chocolate and Nutella you really can't go wrong.  Now this recipe doesn't require eggs.  No seriously, cookies with no eggs.  I actually had to reread the recipe because I thought I missed a step when I was making it.  But I decided to stick with it and see how it turned out.  I was really surprised that it was chewy and chocolatey and worked just fine with no eggs.  Of course they were a bit on the flatter side but I enjoyed them and would make them again.  I wish I could have tasted just a bit more of the nutella though.  Maybe using hazelnut extract next time instead of vanilla extract might give it more umph.  I got this recipe from Our Best Bites

          Chocolate Nutella Cookies

          1 1/4 c. all-purpose flour
          1 tsp. baking powder
          1/2 tsp. salt
          2/3 c. Dutch-process unsweetened cocoa powder
          1/2 c. (1 stick) butter, room temp.
          1/2 c. sugar
          1/2 c. dark brown sugar
          1 1/2 tsp. vanilla extract)
          1/3 c. Nutella
          1/3 c. milk

          Preheat oven to 325°  In a small mixing bowl, whisk together the flour, cocoa powder, and baking powder. Set the mixture aside. In a large bowl, beat together the butter, granulated sugar, and brown sugar with an electric mixer on medium speed for about 2 minutes or until smooth. Add the extracts and beat for another 30 seconds or so. Add the Nutella and beat until smooth.  With the mixer running, add half of the flour mixture and mix until combined. Add the milk, mixing until combined completely, then add the remaining flour mixture and mix completely. Cover and refrigerate the dough for at least 15 minutes (and as long as 2-3 days).  When you’re ready to bake the cookies, line a baking sheet with parchment paper. Roll tablespoons of dough into balls and place them on the lined cookie sheet, allowing about 2″ between the dough balls.

          For fluffier cookies leave in balls.  For flatter cookies lightly press the dough balls with the bottom of a drinking glass (or palm of your hand) and then bake for 10-12 minutes or until the cookies are crackly on top and soft, but starting to set. Remove from the oven and allow them to stand for about 5 minutes and then transfer the cookies to a cooling rack and allow them to cool completely. 

          Post shared with:  
          Sweet As Sugar Cookies
          Debbie Debbie Doos 

          Taco Pizza

          The other night was pizza night.  I find it very difficult to find good quality ingredients that I apparently took for granted back in the States.  You can't find a good fresh mozzarella cheese and Parmigiana Regiano doesn't seem to exist here, so I decided we just need to expand our pizza night into new kinds of pizzas.  I've made this once before but it was quite some time ago.  Everyone in my house loves tacos and loves pizza so the two together was certainly a hit!


          Pizza Dough (recipe below)
          1 lb. ground beef
          1 package taco seasoning
          Lettuce
          Tomato
          2 c. Mexican cheese
          1 c. salsa

          First start with your pizza dough.  Of course, you can save yourself a step and do a premade pizza dough if you wanted.  

          Basic Pizza Dough:

          1 package active dry yeast (2 ¼ tsp.)
          1 tsp. sugar
          1 c. warm water
          2 tsp. salt
          2 tbsp. Extra-virgin olive oil
          3 c. flour, plus more for dusting

          Add yeast and sugar to warm water and let stand 5 minutes.  Add flour and salt to food processor. Add oil to yeast mixture, stir and then slowly pour into flour mixture in food processor.  Use plastic blade on food processor.  Once dough ball forms, knead a few times onto lightly floured surface.  Place in well oiled bowl and let rise 1 hour.   Divide in half and cover the half you aren't working with.  Place flour on your work surface and roll out the dough into a large circle.  I like to tuck my edges under to form the crust.  I then poke holes with a fork to prevent bubbles and I always bake on a preheated baking stone at 500 degrees.  (Makes 2 large pizzas) 
           
          While your dough is rising go ahead and brown your ground beef just like you do for tacos.  Add in your taco seasoning and water if the seasoning packet requires it.   After your roll out your dough, prick it with a fork spread your salsa over the dough just like you would a regular tomato sauce.  Use as much or as little as you like.  Then add your meat and cheese.  Bake 500 degrees for about 10-12 minutes or until edges are nice and golden brown.  Top with lettuce, tomato and any other taco topping you like such as guacamole or sour cream.  Enjoy!