Monday, December 31, 2012

Pumpkin Almond Flour Waffles - Paleo

My kids really aren't on board with the no grains thing in my house even though my husband actually finally is interested in a better diet in our house.  So to help my kids get on board without feeling deprived I made them these Pumpkin Almond Flour Waffles.  They were really good.  My kids liked them, though my daughter kept telling me she was sure I put nuts in her waffles and she doesn't like nuts, she still ate 3 of them.  I'm not sure yet how well these freeze and reheat but will find out soon.  I doubled the original recipe because my family tends to eat alot!  I tasted mine and immediately thought of how awesome these would be with fresh berries.  This is a recipe I'll definitely be making again for my kids.   

I found the original recipe at PaleOMG.  

Pumpkin Almond Flour Waffles
1 cup pureed pumpkin
1 1/2 cup almond flour
1/3 cup canned coconut milk
1 cup shredded unsweetened coconut
4 tablespoon maple syrup
4 eggs, whisked
1/2 teaspoon baking soda
1/2 teaspoon baking powder
1 tablespoon vanilla extract
1 teaspoon cinnamon
1/2 teaspoon nutmeg
1/2 teaspoon ginger
Heat up your waffle iron.  In a medium sized bowl, mix together coconut milk, eggs, maple syrup, and vanilla.  Then add the rest of the dry ingredients and pumpkin and mix together. Add a bit more coconut milk, if needed. The batter should be runny but have a bit of thickness to it.   Ladle into your waffle maker. Be careful, they expand a bit. Cook until done.  I found they were a bit fragile removing them from the waffle iron so just be careful with them.  

Saturday, December 29, 2012

Paleo Pizza Crust


I'm really not overly sure how many times I've attempt to do the Paleo diet and failed but yet again my husband and I have decided to try.  It is such a restrictive diet from the American "normal" diet that it is a bit difficult to adjust to.  BUT I've already given up dairy this year and I eat almost no bread or grains anymore with the exception of oats so I feel I'm better prepared to try this again.  It is how I would like to eat.  Lots of protein, vegetables, nuts, seeds and fruit.  You cannot have grains, so no flour, no corn, no oats.  No beans.  Nothing processed.  No sugar.  Sounds super healthy and I need to strive to eat better.  My kids LOVE pizza!!

This to me was like eating a pizza on top of a unsweetened, garlic flavored pancake.  I need it to be a bit thinner and more crisp for me to really get on board with it but it definitely has potential.  I just need to work with it a bit more to make it something more fitting for me.  My kids both loved it.  My ridiculously picky daughter ate 3 mini pizzas.  They ate it without any complaint.  We made homemade Paleo sausage to top our super veggie pizza which was amazing.  Granted after I made this I realized I think bell peppers are a nightshade vegetable and I've got to read up on that a bit but I don't think I'm suppose to be eating those, oops. 

Just to make things easier I opted to cook these on a griddle first (like pancakes) for easier flipping and so everyone could have there own mini pizzas then we topped them and baked them in the oven. 

Found the original recipe here - Caveman Strong.  We changed a few things from the original recipe.


Paleo Pizza Crust
 

3 eggs
1/2 cup of coconut flour
1 cup of unsweetened almond milk
1 tsp. of garlic powder
1/2 tsp. baking soda

1 tsp. dried basil
1 crushed/minced garlic clove
 

Preheat your oven to 375 degrees. Prep cookie sheet or pizza pan by covering it with parchment paper to fit the bottom of the pan.  Brush with coconut oil or olive oil to prevent sticking.

Add all ingredients into a bowl and mix until combined.  Start pouring on your griddle immediately as the batter will thicken as time goes on. This will be more like a batter….not so much dough.  After 2-3 minutes flip the pancake sized mini pizza crusts and place finished ones on the baking sheet.  Bake an additional 6-10 minutes until toppings are heated through.  

You can pour the entire batter into any shape or size you want and bake for 20 minutes then flip in the oven (use parchment paper to prevent sticking) if you prefer to use that method iinstead of the griddle.  

Friday, December 28, 2012

Chicken & Kale Soup

I'm trying to get away from bread and grains so am struggling to come up with lunch ideas that are quick, easy and not just a meal replacement shake.  Sometimes I want food, not a shake.  So I've started making big batches of soup and keeping it in the fridge to reheat as needed.  This is one of my current favorites.  It's healthy and absolutely delicious!  I won't lie that I kinda wish I had a big bowl on the table with some sort of crunchy bread to eat with it but thus far I have resisted the urge to bake it.  I make homemade chicken stock with this recipe because I think it makes it that much better.  But you certainly can just skip over the entire chicken stock part and go to the soup making part and just use a store bought rotisserie chicken instead.  I'll tell you my little cheat to make my chicken stock extra super amazing and awesome.  Instead of all water with my chicken and vegetables I add in a good quality pre-made chicken stock.   

Chicken & Kale Soup

1 whole chicken, shredded
2 boxes of (good quality) chicken stock (or recipe below for homemade stock)
3 medium carrots, peeled and diced
1 large bunch of kale, chopped with middle stem removed

Add chicken stock to a large stock pot.  Shred the chicken, chop the vegetables and add it all into the stockpot.  Simmer on a medium-low for about 20-30 minutes or until carrots are nice and tender. 

Homemade Chicken Stock

1 whole chicken
2 bay leaves
6 sprigs thyme
small handful of black peppercorns
1 head garlic, split through the equator
2 tablespoons salt
3 rough chopped whole carrots
2 rough chopped stalks celery

1 rough chopped onion
4 c. (good quality or toss in a bullion cube) chicken stock
4 c. Water  (roughly)

Add everything into a stockpot and simmer on a medium heat for 2-3 hours until chicken falls off the bones and stock tastes awesome.  Make sure your liquid comes to the top of the chicken but doesn't have to cover it completely.  Strain the stock before using.  


Thursday, December 27, 2012

Amish Friendship Bread

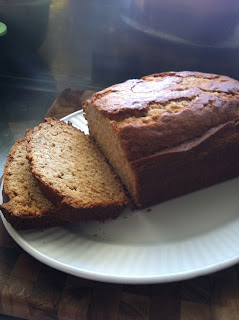
One of my closest friends here in Japan gave me this friendship bread.  I've never had it before and never heard of it before but the idea of it is really a cute idea.  You make a starter and it has to sit for 10 days.  You add something to it on day 5 and day 10 then you split it into 4 batches.  You keep one batch and then you remove 1 cup and place it into three separate containers that you then give to your friends with the instructions for them to keep the starter and eventually end with bread while they then do the same thing and give three of their friends a starter.  It think it has been a while since making bread here in my house so everyone was very excited.  It certainly didn't disappoint either.  It was really tasty.  It has the texture and density much like a banana bread but with cinnamon instead. The original recipe claims that you cannot use anything metal and must use plastic or wooden utensils and a plastic or glass container/bowl when making this so not sure how true it is but passing that tid bit on as well. 

Amish Friendship Bread Starter:

1 pkg. active dry yeast
1/4 cup warm water (110 degrees F)
1 cup all-purpose flour
1 cup white sugar
1 cup warm milk (110 degrees F)


In a small bowl, dissolve the yeast in warm water for about 10 minutes. Stir well.  In a 2 quart glass or plastic container, combine 1 cup sifted flour and 1 cup sugar. Mix thoroughly or the flour will get lumpy when you add the milk.  Slowly stir in warm milk and dissolved yeast mixture. Loosely cover the mixture with a lid or plastic wrap. The mixture will get bubbly. Consider this Day 1 of the cycle, or the day you receive the starter.

For the next 10 days handle starter according to the instructions for Amish Friendship Bread below.

Amish Friendship Bread Recipe

Day 1 - receive the starter (the recipe for the starter is below)
Day 2 - stir
Day 3 - stir
Day 4 - stir
Day 5 - Add 1 cup each flour, sugar and milk.
Day 6 - stir
Day 7 - stir
Day 8 - stir

Day 9 - stir
Day 10 - Add 1 cup flour, 1 cup sugar and 1 cup milk. Divide into 4 containers, with 1 cup each for three of your friends and 1 cup for your own loaves. Give friends the instructions for Day 1 through Day 10 and the following recipe for baking the bread. After removing the 3 cups of batter, combine the remaining cup of Amish Friendship Bread starter with the following ingredients in a large bowl:

2/3 cup oil
3 eggs
1/2 tsp. salt
1 tsp. vanilla
1 to 1 1/2 tsp. cinnamon
1 cup sugar
2 cups flour
1 1/4 tsp. baking powder
1/2 tsp. baking soda

(**optional) 1 cup nuts/1 cup of raisins

Using a wooden spoon beat by hand until well blended. You can add 1 cup raisins and 1 cup nut. Grease a loaf pan with butter, sprinkle with sugar instead of flour.
Bake at 325 degrees for 1 hour.  Check for doneness by inserting a toothpick and if it comes out clean it is done.  Otherwise bake an additional 10-15 minutes until done.  If it starts getting too brown while cooking cover with aluminum foil and finish baking. Cool 10 minutes, remove from pan. Makes 1 large loaf of Amish Friendship Bread.

Sunday, December 9, 2012

Chocolate Almond Butter Protein Balls


I am soooo in love with these.  My kids beg for them.  My husband even eats them!  I've made these with peanut butter with pure maple syrup and almond butter with honey and I think the almond butter and honey are perfect and absolutely amazing!  They are so healthy but yet feel like a dessert cheat.  This time of year with Christmas fast approaching I always find I need cookies and desserts and these really hit the spot.  Of course, much like a cookie, you can't eat juts one so at almost 100 calories a ball the calories can add up quick but at least it is good for you, not stick to your hips and butt type of calories!

Now the version in the picture is minus the chocolate and I used vanilla protein powder just because the chocolate ones looked soooo unpleasant when it came picture time so you can totally make these vanilla or chocolate whatever you like best!   The original recipe as written below uses 1/4 c. of honey, I however prefer mine with 1/8 c. of honey so it all has to do with how sweet you like them you can add or subtract it to your preference.

Chocolate Almond Butter Protein Balls   

1/2 c. almond butter
1/4 c. honey
1 scoop chocolate (soy) protein powder (*or vanilla)
1/4 c. ground flax seed
2 tbsp. cocoa (*optional)
1 c. old fashioned rolled oats (dry)
1 tbsp. coconut oil

Makes 18 large balls or 36 bite size balls.  I'm working on the exact calorie count and nutritional information for these but it is roughly 90 calories a tbsp. size ball.


This post shared with:

Not Your Ordinary Recipes

Saturday, December 8, 2012

The New Me

December 2012
I look back over the last year and sometimes I'm surprised at how far I've come.  Sometime between February through April I decided I was tired of being over weight and needed to do something about it.  I've said this hundreds and hundreds of times over the last 10 or so years and I never stick with anything or actually succeed with losing more than 5lbs or so before gaining it all right back and then some.  Of course pregnancy never helps that whole diet and weight loss thing either.  My oldest is now 5 and my youngest is now 2.  How long can I talk about the baby weight I'm carrying?

December 2011 -
My shameful "Before" picture!
So, I stopped making excuses and started exercising.  I started doing Insanity.  I was so out of shape I couldn't run a quarter of a mile and I couldn't finish the warm-up of Insanity.  That's right, I couldn't actually finish the warm-up!  I could have quit, I could have given up like I've done countless times before.  This time it was different.  I was determined.  How can I be an example for my kids if I'm overweight and do nothing but bake sweets and try to hid that I've eaten the entire batch of cookies or entire pan of fudge myself?  I hired a personal trainer, I found friends that had the same goals as I did.  Other military wives with children that had to workout with their children around because our husband's schedules are impossible to work around.

I am proud to say that today I am a whole new person.  I am 45lbs lighter than I was in the beginning of 2012.  I feel amazing.  I wake up every day with a smile.  I love myself, I love how I feel, I love exercise, I love my energy and for the first time in my life I love looking at myself in the mirror!  I ate healthy and worked out 6 days a week for 9 months.  It didn't happen overnight.  It wasn't easy.  I still struggle daily with my food and sometimes I'm unmotivated to exercise. As of today I run 3x's a week usually 5-7 miles.  I'm still shocked I'm a runner!  I struggled endlessly with shin splints in the beginning.  Then I still try to go to the gym 2-3 times a week for a minimum of 1 hour, including utilizing my personal trainer still one of those days. I'm now a Beachbody coach.  (http://beachbodycoach.com/newdaynewyou) I also am studying to become a certified personal trainer.   

I look back at my blog and it is a reminder to me of the fact that I basically ate nothing but cakes and cookies day in and day out.  Now I don't post.  I miss posting.  But it isn't easy to diet and exercise and still spend time being creative in the kitchen. 

2013 I plan on spending time making healthy dishes and also learning how to make my favorite Japanese dishes.  We have another 1 1/2 years in Japan and I love it and plan on making the most of it.

So stay tuned because I've got some awesome looking Japanese recipes lined up to wrap up this year and hopefully new, creative healthy dishes coming up in 2013.

Tonight I'm going to try to make homemade mochi.  Yes, mochi!  I bet many of you have no idea what that even is!  

Pumpkin Pie Protein Shake

So that time of year again when every time I go into the kitchen I come out having made something pumpkin.  Even my protein shakes have turned pumpkin these days!!  I have a protein shake almost every single day.  Sometimes it is my lunch replacement meal other times just a post workout snack.  I'm usually a chocolate peanut butter protein shake kinda gal but I was in the mood to try something different today.  Of course you can leave the oats out if you can't handle the texture it gives them but I don't mind it, I enjoy it.  I suggest keeping your pumpkin in the fridge before making this.  I don't add ice to my shakes because I have the worst blender ever so I put my pumpkin in the fridge to keep my shake cold. 

Pumpkin Pie Protein Shake

1 1/2 c. almond milk (original)
1/3 c. pure pumpkin
1/2 c. old fashioned rolled oats (dry)
1 scoop vanilla (soy) protein powder
1 ripe banana
1 tsp. cinnamon
1/2 tsp. pumpkin pie spice

Add all ingredients into the blender and puree until smooth.  We as smooth as you can get a shake with oats.  The longer it sits the thicker it will get because of the oats so you may have to adjust the amount of almond milk you add to it.  Enjoy!