Sunday, July 31, 2011

Reese's Peanut Butter Bars

I love cookie bar recipes and feel I just don't make them enough.  If I had to choose a favorite candy bar it would be either Reese's Peanut Butter Cups or Milky Way Midnight.  I decided I needed to make a dessert with these candy bars.  Today I bought a bunch of Reese's Peanut Butter Miniatures and figured I'd decide what to do with them once I got home.  I thought why not make it into a cookie bar, it is quick, easy and delicious.  I just made my normal chocolate chip cookie dough recipe with a bit less chocolate chips and in the middle did the entire pan with Reese Miniatures then topped it with more cookie dough.  I love that you cut into it and see the hunks of peanut butter and chocolate from the melted Reese's!

Reese's Peanut Butter Bars

1 c. shortening or butter
3/4 c. brown sugar
3/4 c. white sugar
1 tsp. vanilla
2 large eggs
2 1/4 c. all-purpose flour
1 tsp. baking powder
1 tsp. baking soda
1 1/2 c. semi-sweet chocolate chips
Pinch of salt
1 1/2 bags of Reese's Miniatures

Preheat the oven to 375 degrees.  Combine shortening/butter and sugars in a bowl and mix until combined.  Add in the vanilla and one egg at a time beating until well combined.  In another bowl add the flour, baking powder, baking soda and salt and whisk until combined.  Pour flour into egg/sugar mixture until just combined and add the chocolate chips. Spread half of the cookie dough into a square pan (I think mine was roughly 6X6ish).  Take the wrappers off all the Reese's and line up covering the entire pan.  Spread the remaining cookie mixture over the top covering the Reese's completely.  Bake roughly 25-30 minutes or until golden brown.  Allow to cool before cutting.    

Post shared with:

Sweet as Sugar Cookies


Thursday, July 28, 2011

Flank Steak Tacos

Since living in Japan we are quite limited in Mexican restaurants to choose from so I wanted to start working in making my own.  I will say we do have on Mexican restaurant right off base here in Yokosuka that is really good but still, it is nice to be able to do it myself.  I went all out and marinated a flank steak and thin sliced it, made homemade tortillas, homemade salsa and guacamole.  It was a good day in our house! This marinade was incredible.  One of the best I've ever had.  My 3 year old took the spoon and drank the meat "juice" off the plate!  She isn't big on meat but she devoured this. I served our tacos with sauteed onions, refried beans and queso fresco cheese.


Flank Steak Marinade

3 lbs. flank steak
1/3 c. white vinegar
1/2 c. soy sauce
4 minced garlic cloves
2 limes, juiced
1/4 c. olive oil
1 tsp. salt
1 tsp. black pepper
1 tsp. garlic powder
1 tsp. cumin
1 tsp. paprika
1 tsp. chili powder

Take out flank steak and use a fork to pierce holes in both sides.  Add to large ziplock bag.  Combine vinegar, soy sauce, garlic cloves, lime juice, olive oil, salt, pepper, garlic powder, cumin, paprika and chili powder in a small bowl and whisk until combined.  Pour over flank steak.  Allow to marinate at least 8 hours or overnight.

Place flank steak on aluminum foil on a baking sheet under high broil for about 10 minutes on each side.  Allow to rest 10 minutes.  This makes a 3lb. flank steak medium with just slight pink throughout.  Slice very thinly at an angle against the grain for best results.   


Guacamole

1 large avocado
1 lime, juiced
pinch of garlic powder
pinch of salt & pepper

Mash avocado with lime juice until the consistency and texture you like, add in the garlic powder, salt & pepper.  Keep plastic wrap on until ready to use.  Guacamole doesn't keep well so use very shortly after making.  Push the plastic wrap all the way down until it actually touches the top of the guacamole so the top doesn't turn brown.  

Homemade Salsa

3 whole tomatoes
1 whole spanish onion
1 dried ancho-chili
4 garlic cloves
lime juice
salt & pepper
1 jalapeno
Olive oil

Preheat oven to 450 degrees.  Core your tomato, and rough chop your onion, remove the top off your jalapeno and peel your garlic cloves.  Place tomato (whole), onion, jalapeno and garlic on a baking sheet and drizzle with olive oil, salt and pepper.   Roast roughly 20 minutes or until tender and very fragrant.  Meanwhile pour hot, almost boiling water in a bowl and place your dried ancho-chili pepper into the bowl to reconstitute the pepper.  Allow to sit at least 20 minutes in the water.  Once your remove your tomato and vegetables from the oven, allow to cool slightly and peel your tomato (personal preference).  Pour your tomato, jalapeno, onion, garlic into a blender.  Remove the top off your ancho pepper and add to blender as well.  Blend until desired consistency, whether smooth or chunky.  Add in lime juice and salt and pepper to taste.  If you like it really spicy add additional jalapenos.  I found one was just enough heat for me.  I didn't add cilantro to mine because I personally don't care for it, but if you like it, add it!

Homemade Flour Tortillas

Back in Washington I would always make a trip to our local Central Market store to buy fresh made flour tortillas.  I absolutely loved them and apparently got quite spoiled eating them.  Now that I'm here in Japan and have only the preservative loaded garbage ones you can buy already made at the grocery store I realized I could make my own or just never eat them again!  I was surprised at how easy this was to do and how fantastic they tasted.  I will never have to buy tortillas again!  I don't know if the "resting" periods are absolutely necessary but with 2 small children everything I make ends up with lots of "resting"!


Homemade Flour Tortillas

3 c. all purpose flour
2 tsp. salt
2 tsp. baking powder
3/4 c. shortening or lard
3/4 c. warm water

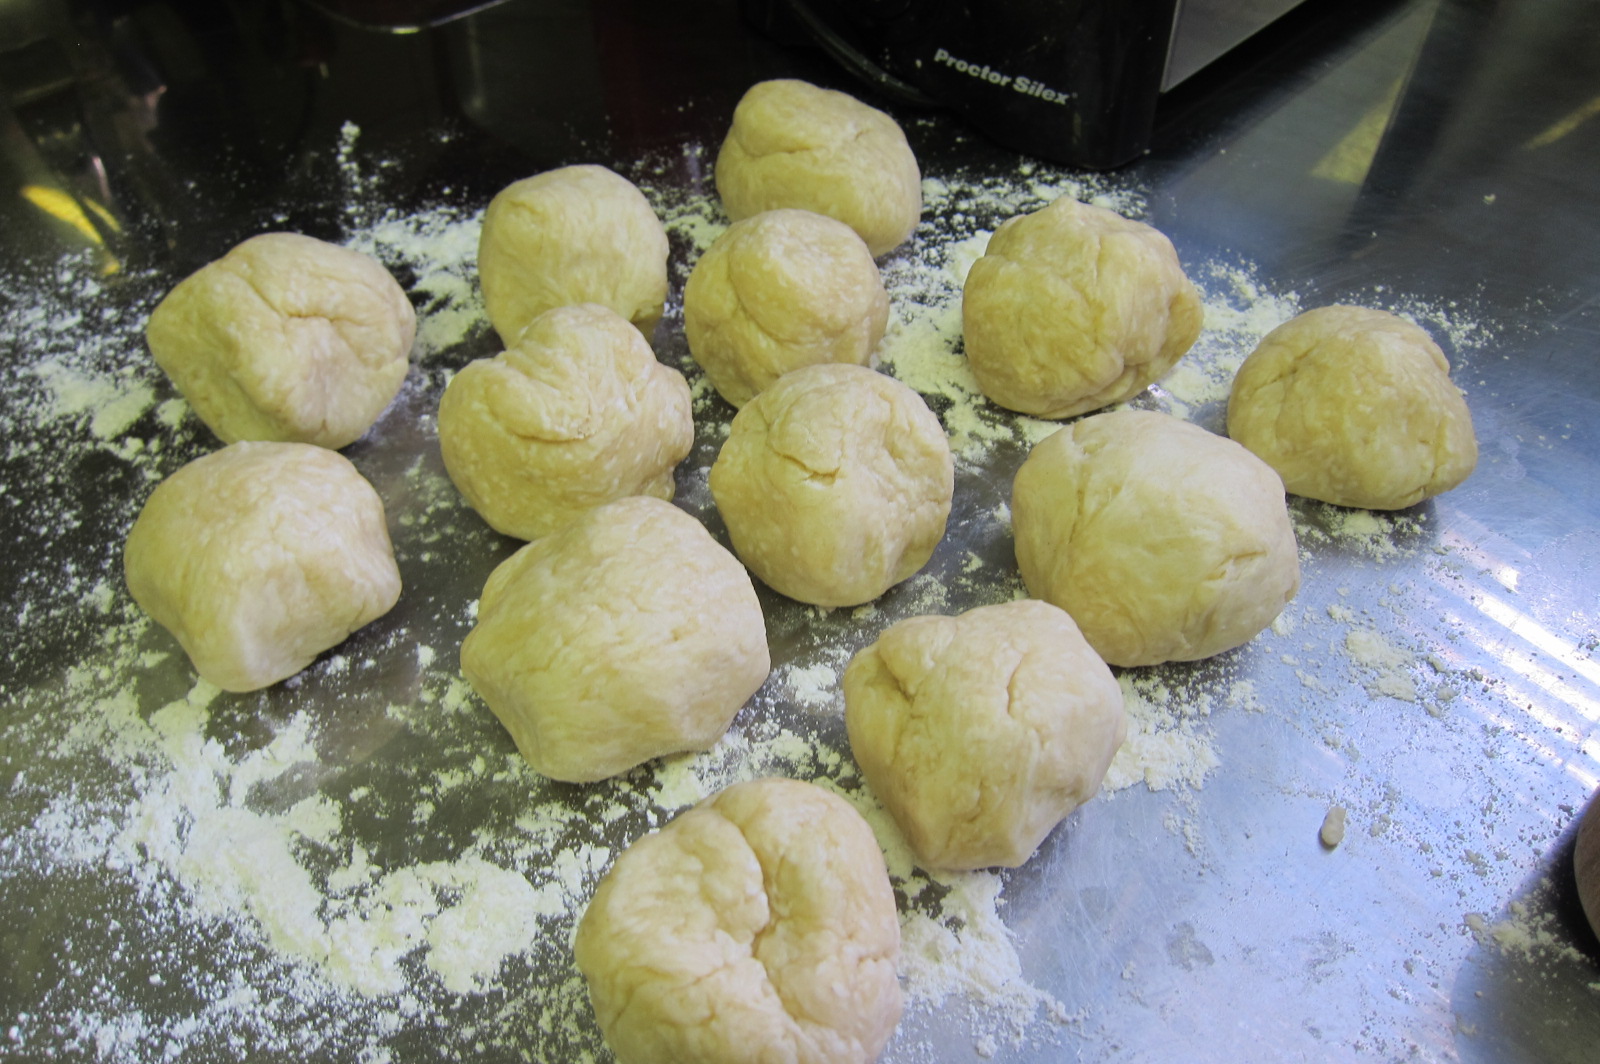
Combine flour, salt and baking powder in a bowl.  Add in shortening or lard and use a pastry cutter, fork or your hands to work the shortening into the flour until it turns into a course mixture almost like sand.  Then pour in the water and use your hand or wooden spoon and mix/stir until a rough dough forms.  Add flour to your work surface and knead the dough for a few minutes until a more defined dough ball forms.  Cover and allow to rest 45 minutes.  Rip the dough ball into roughly 12 pieces and roll into small balls and cover and allow to rest another 30-45 minutes.  Heat a cast iron skillet to a medium to medium high heat.  Roll each dough ball very thinly.  You can separate with plastic wrap or parchment paper if you roll them all before cooking them.  Throw one onto your cast iron skillet and allow to cook for about 30 seconds each side until slightly brown spots form.  You may have to work with the temperature settings.  Some stoves you'll need it higher where others will need it lower.  You want to cook it until barely brown and still pliable, not crisp and not burnt.  Remove and place in a tortilla warmer or hand towel and keep covered to keep it warm.  Best used the same day.  You can also freeze with parchment paper in between and pull out and cook as needed.

Fruit & Nut Granola

I love granola and love that it is such a quick easy thing to make and you can throw anything you like into it.  No one in my house eats it but me but that's certainly alright with me because that just means there is more for me!  I normally like to use cranberry juice but didn't have any on hand so used a bit of orange juice instead and I really liked the hint of orange flavor it gave it.  You can always modify your granola recipe to include your favorite goodies!
Fruit & Nut Granola

2 c. old fashioned oats
1/2 c. dried cherries
1/2 c. dried cranberries
1/2 c. sweetened coconut
1/2 c. chopped pecans
1/2 c. chopped almonds
1/4. c. honey
1/4 c. maple syrup
1/8 c. brown sugar
1/8 c. orange juice
2 tsp. cinnamon

Place honey, syrup, brown sugar and orange juice in a saucepan on medium-low heat until sugar is dissolved.  Toss oats, dried fruit, nuts and coconut into a bowl.   Add cinnamon and toss to combine.  Pour syrup mixture over the top.  Bake 300 degrees for 20-30 minutes.  Pull out of the oven and stir every 10 minutes to prevent burning.  Allow to cool completely before storing. 


Sunday, July 24, 2011

Mama's Rice Krispy Treats

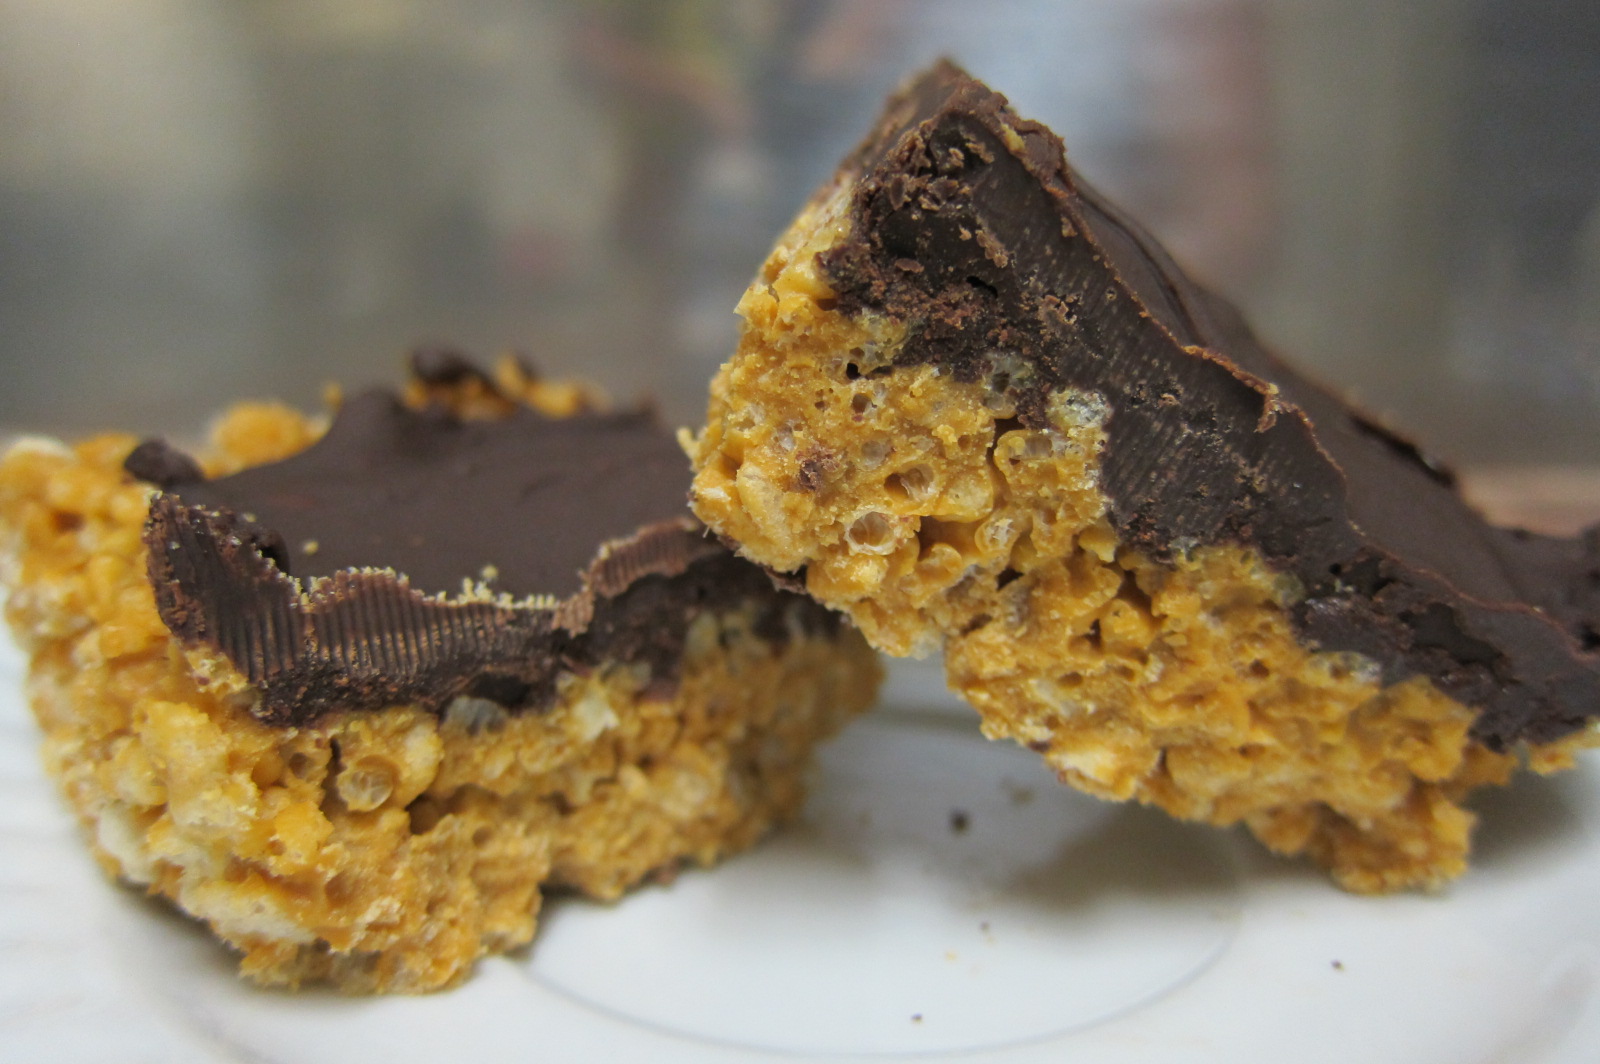
Growing up my mom always made rice krispy treats for us kids.  Though her version wasn't the version most people know.  We don't use marshmallows in our rice krispy treats.  I personally love this kind and have never and will never make the kind with marshmallows.  Since I am so very far from home being in Japan and all and I'm such a mama's girl I wanted to make something that reminded me of my mom and home a bit.  Being so far away makes me miss my mom more than I usually do!  My mom use to put the chocolate in the middle but I did it on the top instead just because I didn't have a ton of time to make these because the kids wanted to go to the park.  These are awesome and I personally think once you have this rice krispy treat you'll never care about the ones with marshmallows again!  And did I mention these are super simple and quick to make! I crumbled my rice krispys just a bit instead of leaving them completely whole but that is just a personal preference and isn't necessary.  Also you can adjust the amount of butterscotch chips if you want.  I like to add a few extra ounces in there then what the recipe actually calls for just for extra butterscotch deliciousness! 

Mama's Rice Krispy Treats
 
8 c. rice krispy cereal
1 c. creamy peanut butter
12 oz. butterscotch chips
24 oz. dark chocolate

Place your rice krispys in a food processor and pulse about 5 times just to break them up a bit.  About 4 cups at a time will fit.  Or place in a large ziplock bag and smash just a bit.  You don't want crumbs just to break it up a bit.  Melt the peanut butter and butterscotch chips in a double boiler.  Pour over the rice krispys and stir until completely coated.  Pour onto a greased 8x10 pan and place in the fridge to cool and allow to start to set.  Next melt the chocolate (I used dark because I like it better) in a double boiler and just pour the melted chocolate over the top of the rice krispys until the entire top is coated.  It is easier to pour and spread if the rice krispys have cooled a bit first.  Then just place in the fridge until completely cooled and set and then cut into bars.

Saturday, July 23, 2011

Cookie Dough Truffles

After I made these cookie dough truffles I asked my husband on a scale of one to ten what he thought of them.  He gave them an eleven!  The night I made them, I got up in the middle of the night to find my husband in the kitchen giggling to himself while eating one.  If you knew my husband you'd know, he doesn't giggle.  Manly men don't giggle, but I swear to you, it sounded much like a giggle to me.  He said he thought about bringing some to work with him but they were so good he didn't want to share them.  So, with that being said, these were definitely a hit.  My daughter added the sprinkles as her special touch to them because she is 3 1/2 and feels everything needs sprinkles.  These were relatively simple to make as I did it all while holding my 1 year old.   

Cookie Dough Filling:

3/4 c. brown sugar
3/4 c. white sugar
1 c. shortening (or room temp. butter)
4-5 tbsp. milk
1 tsp. vanilla extract
2 c. semi-sweet chocolate chips
2 1/4 c. all-purpose flour

Coating:

12 oz. dark chocolate
Sprinkles

Cream the shortening and sugar together until light in color.  Add in the vanilla and milk.  Stir in the flour and then the chocolate chips until combined.  Roll into about a teaspoon size ball and place on a baking sheet lined with parchment paper and place in the freezer for about 30 minutes.  Meanwhile melt the dark chocolate over a double boiler.  Take the cookie dough balls out of the freezer and dip into the melted chocolate mixture and place back on the parchment paper.  I leave my chocolate on a low temperature so that the chocolate doesn't start to harden again while I'm dipping the dough into it.  I also just use my fingers as I find it isn't too hot and easier to do that way while holding a baby.  Once you place back on the parchment paper sprinkle your sprinkles or roll in a topping of choice.  I would have liked to melt some colored chocolate, white chocolate or peanut butter and drizzled it over the top but my daughter over ruled me with the sprinkles.  Place in the fridge until firm.  Enjoy.

Thursday, July 21, 2011

Chocolate Birthday Cake

Today is my little boy's 1st birthday!  We did celebrate it 2 days early though because of my husband's work schedule but I just can't believe Nathan is 1 already.  I baked a cake for him and a separate one for us.  Gotta have the "smash cake" for the first birthday. I have a couple of chocolate cake and chocolate frosting recipes I've used before but wanted to try a new recipe this time.  The cake and frosting were both really good just lighter than what I normally make.  That isn't a bad thing I suppose I just have an insatiable sweet tooth and always find the sweeter the better.  The frosting was creamy and silky but again I like my sweeter chocolate buttercream made with powdered sugar.  This was one of those recipes that I liked but have others I like better.   Also this recipe makes a TON of cake.  It is an Ina Garten recipe and is used for a three tier cake.  I did two small cake pans and two 8 inch cake pans and it easily made all four of those and I had more than enough frosting for it all too.  I'm not the best with cake decorating (and by not the best I mean I'm quite terrible at it) but tried to make it pretty enough to be smashed to pieces!    

 Chocolate Birthday Cake: 

3 1/2 cups all-purpose flour
2 cups cocoa powder
1 tablespoon baking soda
1/2 teaspoon kosher salt
1 1/2 cups (3 sticks) unsalted butter, at room temperature
1 1/3 cups granulated sugar
1 1/3 cups light brown sugar, packed
4 large eggs, at room temperature
4 teaspoons pure vanilla extract
2 cups buttermilk, at room temperature
1 cup sour cream, at room temperature
1/4 cup brewed coffee

Preheat the oven to 350 degrees F.
Butter two 8 inch cake pans and two 3 inch cake pans. Line the bottoms with parchment paper, and butter and flour the pans. Sift the flour, cocoa, baking soda, and salt together in a medium bowl. In the bowl of an electric mixer fitted with a paddle attachment, cream the butter and sugars on high speed until light, approximately 5 minutes. Add the eggs and vanilla and mix well. Combine the buttermilk, sour cream, and coffee. On low speed, add the flour mixture and the buttermilk mixture alternately in thirds, beginning with the buttermilk mixture and ending with the flour mixture. Mix the batter only until blended. Divide the batter between the three pans and smooth the tops with a spatula. Bake on the middle rack of the oven approximately 25-30 minutes for the small pans and 30-35 minutes for the 8 inch pans or until a toothpick comes out clean . Cool the cakes in the pans for 10 minutes each on a cooling rack, carefully remove from the pans and allow to finish cooling.  Once cool frost the top and sides of that layer with buttercream. Spread any remaining buttercream over the cake evenly. 

Chocolate Buttercream Frosting:
1 pound bittersweet chocolate
12 ounces semisweet chocolate
3/4 cup egg whites (4-5 large eggs), at room temperature
1 1/2 cups granulated sugar
1/4 teaspoon cream of tartar
3/4 teaspoon salt
1 1/2 pounds unsalted butter, at room temperature
3 teaspoons pure vanilla extract

 
Chop the chocolates and place them in a heat-proof bowl set over a pan simmering water. Stir until melted and set aside until cooled to room temperature. Mix the egg whites, sugar, cream of tartar, and salt in the bowl of an electric mixer fitted with a whisk attachment. Place the bowl of egg whites over the pan of simmering water and heat the egg whites until they are warm to the touch, about 5 minutes. Return the bowl to the electric mixer and whisk on high speed for 5 minutes, or until the meringues cool and holds a stiff peak. Add the butter, 1 tablespoon at a time, while beating on medium speed. Scrape down the bowl, add the melted chocolate, vanilla and mix for 1 minute or until the chocolate is completely blended in. If the buttercream seems very soft, allow it to cool, and beat it again.